Opening a Collection | Adjusting Image Display | Adding Layers | Creating and Editing Shapes | Adding Labels | Measure Distance/Area | Saving Work | Printing
|
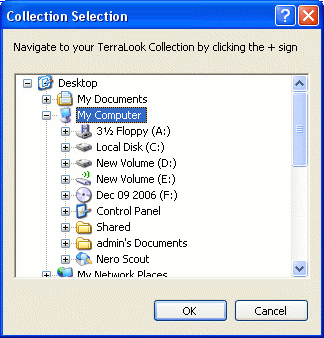
1. Navigate to the Collection: Click File->Open Collection (or press CTRL+C), navigate to the folder containing the Collection then click the OK button on the dialog that appears. Depending on the collection, between seven and eight layers will be displayed in the Layer Manager to the left of the Main Window: a low resolution World Image file, Country Boundaries and Protected Areas (not provided with all collections) and three to five 'footprint' layers labeled according to the satellite sensor (Landsat 1975, Landsat 1990, Landsat 2000, ASTER 2000 and when available, IKONOS). Click the Zoom/Box Zoom button (the magnifying glass) on the toolbar, then either 1) click-drag a rectangle covering your area of interest or 2) click and hold the left mouse button (right button zooms out). 2. Find and open an Image: The Layer Manager is opened and displays this series of layers, with 'footprints' of each available image. All available Sensor layers will be visible when first opened. You can also control which images will be opened by controlling the visibility of each layer in the Layer Manager. To control which layers are displayed, click in the column with the eyeball. For example, click to the left of “Landsat 2000” to show the eyeball, and the image footprints (square boxes) for that layer will display. The "Active Layer" is the one that is highlighted. Many functions work only on the Active Layer (such as Select Shape Feature). . Keeping only a single layer visible will open the images in a new view. When more than one sensor layer is visible at a time, a dialog will appear - you can either:
|
Not satisfied with the display quality of the images? Use on of the following Image Enhancement Tools available on the Toolbar to change display parameters:
|
|
Perform a linear, histogram stretch or logarithmic enhancement on the active layer (this must be an image). Changes do not affect the original image on disk. |
|
|
Re-compute the last enhancement, but restrict the calculations to pixels currently visible in the view. If, for instance, your image contains a large swath of ocean, zoom into the land area of interest so that no ocean pixels are visible in the viewarea, select an enhancement (linear, equalize, logarithmic), then click on this tool. Changes do not affect the original image on disk. |
TerraLook, like any GIS, displays information that can be held as a stack of
layers. Images and pre-defined shape files a layer of information
consisting of points, lines or areas such as the boundary of a protected area) by clicking on the
![]() tool on the Iconbar
or by using the File->Open Shape File or Project
and clicking OK.
Shape files end with a .shp extension. Shape layers
can be made transparent so that layers underneath may be viewed simultaneously,
but Image files are opaque.
tool on the Iconbar
or by using the File->Open Shape File or Project
and clicking OK.
Shape files end with a .shp extension. Shape layers
can be made transparent so that layers underneath may be viewed simultaneously,
but Image files are opaque.
Click on one of the Drawing Tools on the Iconbar:
|
|
Use RightMouseButton-Click to draw points. Symbol color can
be changed using the
|
|
|
Use
RightMouseButton-Click to start drawing a line. Use LeftButton-Click to stop.
Line color can be changed using the
|
|
|
Use RightMouseButton-Click-Drag to draw a rectangle. Release
the mouse button to stop. Outline color can be changed using the
|
|
|
Use RightMouseButton-Click to start drawing a polygon, and
keep clicking the mouse to add nodes. Use LeftMouseButton-Click to close the
polygon. Outline color can be changed using the
|
|
|
Use RightMouseButton-Click-Drag to draw out an
ellipse/circle. Outline color can be changed using the
|
Additional Shape Editing Tools are available on the Drawing Toolbar:
|
|
Use this tool to add, move, and remove individual nodes that make up point, line and area shapes. See the entry under the Drawing Toolbar section for more details on using this tool. |
|
|
Shapes can be Rotated/Resized using this tool. See the entry under the Toolbar section for more details on using this tool.. |
|
|
Select a line shape(s), then click to launch a color mixer from which the line color can be changed. Polygon outline colors can also be changed using this tool. |
|
|
Select a polygon shape(s), then click to launch a color mixer for changing fill color. To make a transparent fill, set the Opacity to 0.0 |
|
|
Define the symbol used to represent a point shape, it's size and color using this tool. Select a point shape(s), then click to launch a Symbol Properties dialog, from which the point color, symbol and size can be changed. |
|
|
Select a shape(s) for deletion. Shapes can also be deleted using the Backspace or Delete keys. |
Click the
![]() tool on the Iconbar,
then click the viewarea on the location where the label should be placed. A
dialog is
presented::
tool on the Iconbar,
then click the viewarea on the location where the label should be placed. A
dialog is
presented::
|
|
Type in the text content of the label in the field provided, then click the OK button. Font properties and Label Color must be set before placing the label. To edit an already placed label, select the label (a box appears
around the text), then click the
|
Click the
![]() tool on the Iconbar.
Notice that the mouse cursor will change to a bulls-eye. Use RightMouseButton-Click
to define the points between which distance is to be calculated. As you
continue to add points, the distance for each segment and the total distance
between the points is printed on the view.
tool on the Iconbar.
Notice that the mouse cursor will change to a bulls-eye. Use RightMouseButton-Click
to define the points between which distance is to be calculated. As you
continue to add points, the distance for each segment and the total distance
between the points is printed on the view.
Click the
![]() tool on the Iconbar.
Notice that the mouse cursor will change to a bulls-eye. Use RightMouseButton-Click
to define three or more points: the area enclosed by the points is calculated and printed on the view.
tool on the Iconbar.
Notice that the mouse cursor will change to a bulls-eye. Use RightMouseButton-Click
to define three or more points: the area enclosed by the points is calculated and printed on the view.
You can save your annotations as a Shape File
(though you cannot mix different feature types in the same file--
can’t mix points with lines, for example).![]() tool on the
Iconbar or use the File->Save Vector Layer As menu entry.
tool on the
Iconbar or use the File->Save Vector Layer As menu entry.
If you are in the middle of something and want to
finish it later, you can save it as a Project by ![]() tool on the Iconbar or
using
tool on the Iconbar or
using ![]() tool or the File->Open
Shape File or Project menu entry.
tool or the File->Open
Shape File or Project menu entry.
Click the
![]() button on the Iconbar
to capture the contents of a view for printing.
button on the Iconbar
to capture the contents of a view for printing.

|
Driver: In this release, the Windows Print Driver must be selected under the Driver option menu in order to print out the contents of the view using an installed Printer Device. Clicking on the 'Print' button leads to a dialog for selection of an installed printer. Paper size and other printer options (no. of copies etc) can be controlled using this dialog. Output will always be printed as large as possible given the selection of paper type. Other driver options provided include::
Device: Select whether the resulting output is spooled directly to the printer or saved to a file. This option is always File for PNG and TIFF, and always Spool To Printer for Windows Print Driver. PostScript may be spooled, or directed to a file. File/Command: If the Device is File this is the name of a file to save the print to. If it is Spool to Printer this will be a command to be used to spool to the printer. The PostScript text will be directed to the standard input of the indicated command. Output Type: Either Greyscale or Color to control the type of output produced. Paper: (PostScript only) Select the paper size. This is used to establish size and positioning of the view. Scale: (PostScript only) Modifies the scale at which the print is produced. A value of 0.5 would cause the view to be 50% the normal size, but still centered on the paper. Resolution: The resolution at which the current view will be rendered for output. A value of 2.0 would cause the view to be internally rendered at double the resolution of the screen display for output. |

